How to Clean Your Grinder the Right Way and Save Your Kief

Key Takeaways
- A dirty grinder does not just affect performance; it directly impacts flavor and overall experience
- Most buildup comes from resin and fine particles that slowly clog the teeth and screen
- Cleaning is not just about hygiene; it also helps preserve and recover trapped kief
- The way you clean your grinder determines whether you lose or recover valuable material
- Regular maintenance is more effective than occasional deep cleaning
A grinder is one of those tools people use every day without thinking much about it. It works, until it suddenly doesn’t. It gets harder to turn, starts grinding unevenly, and at some point, you notice that everything feels just a bit off.
What most people do at that stage is either ignore it or do a quick clean without really understanding what is happening inside.
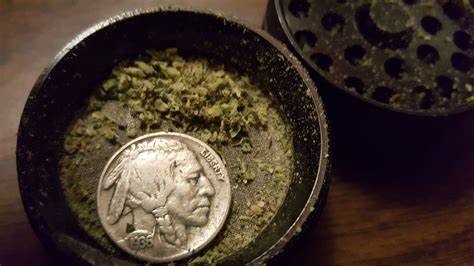
The reality is that grinders don’t just get dirty; they slowly fill up with the most valuable part of your cannabis. Resin and loose trichomes build up over time, especially around the teeth and the screen. If you clean it the wrong way, you are not just removing dirt, you are throwing away potency.
Why Cleaning Your Grinder Actually Matters
There are two ways to look at a dirty grinder.
Most people see:
- buildup
- stickiness
- reduced performance
What is really happening is slightly different.
Over time, your grinder becomes coated with a mixture of resin and kief. This layer affects how the teeth interact with the flower and how efficiently particles move through the screen. That is why grinding starts to feel uneven and why kief collection slows down.
At the same time, that buildup also affects taste. Old plant material and oxidized resin can give your fresh flower a stale edge. It is subtle at first, but once you notice it, it is hard to ignore.
There is also a practical side to this. Moisture and leftover plant matter create an environment where bacteria can develop, especially if the grinder is stored in less-than-ideal conditions. It is not something that happens overnight, but over time it becomes a factor.
Cleaning your grinder is not just maintenance. It is part of preserving the quality of what you are consuming.
The Mistake Most People Make
The biggest mistake is treating cleaning as something you do aggressively and quickly.
People soak everything immediately, scrub hard, and rinse it all away. That works if your only goal is to make the grinder look clean. It does not work if you care about preserving what is inside.
A lot of the material that gets washed away during cleaning is kief that never made it to the catcher. If you go straight to alcohol without thinking about it, you are effectively dissolving and discarding it.
A better approach is to separate the process into two steps: first recover what you can, then clean what remains.
Step One: Recover What Is Worth Keeping
Before using any liquid, take a moment to deal with the dry material.
Disassemble the grinder and look at where the buildup is. Most of it sits:
- around the teeth
- along the edges of the chamber
- on the screen
If the grinder is very sticky, putting it in the freezer for a short time makes a noticeable difference. The cold makes resin more brittle, which makes it easier to remove without smearing it further.
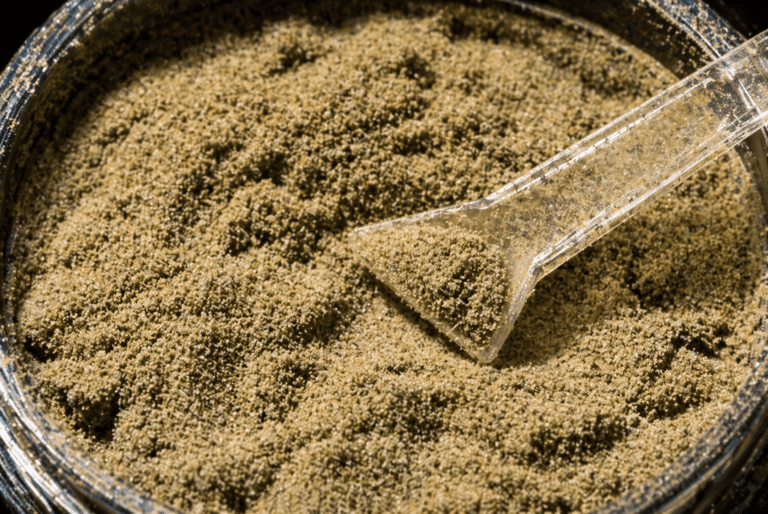
Using a small tool or brush, you can gently collect this material. It will not be as clean as pure kief from the catcher, but it is still usable and often more potent than people expect.
This step alone contains most of the value.
Step Two: Clean the Grinder Properly
Once the loose material is removed, you can move on to the actual cleaning.
At this point, the goal is no longer to recover anything, but to reset the grinder completely.
Isopropyl alcohol works because it breaks down resin quickly and effectively. When you soak the parts, the sticky layer dissolves and separates from the metal. After a short soak, you will notice that even stubborn areas become easy to clean.
Scrubbing should not require force. If it does, the grinder likely needs more time to soak. The screen, in particular, should be handled carefully, as it is the most delicate part of the entire setup.
After rinsing, it is important to let everything dry completely. Any remaining moisture can affect the next use and, over time, contribute to the same issues you just removed.
What Changes After a Proper Cleaning
A clean grinder feels different immediately.
It turns smoothly, grinds more evenly, and the texture of the ground cannabis improves. You will also notice that kief starts collecting more consistently again, simply because the screen is no longer blocked.
Flavor is another noticeable difference. Without old residue interfering, the natural profile of your flower comes through more clearly.
It is one of those changes that seems minor at first, but once you experience it, it becomes part of your routine.
How Often You Should Actually Clean It
There is no exact rule, but most people wait too long.
If you use your grinder regularly, the buildup starts affecting performance long before it becomes obvious. Light maintenance, like brushing out residue every few uses, can significantly delay the need for a full cleaning.
A deeper clean every few weeks is usually enough to keep everything working properly without letting too much material accumulate.
The key is consistency, not intensity.
Final Thoughts
Cleaning your grinder is often treated as a chore, but it is more than that. It is part of maintaining the quality of your entire setup.
If you approach it the right way, you are not just removing buildup. You are improving performance, preserving flavor, and recovering material that would otherwise go to waste.
Most importantly, you are avoiding the common mistake of throwing away value simply because you rushed the process.