
Rolling a joint is a crucial skill for anyone who wants to smoke cannabis. Knowing the best ways of joints a joint will make all the difference to your smoking experience. It will also make sure that you don’t waste any of your precious weed. This “how to roll a joint for beginners” guide shows you how to roll a joint with paper. You’ll also learn how to make it tight and how to roll with or without a filter. When you’ve finished reading, you’ll be an expert!
What Can Go Wrong?
If you don’t learn how to roll a joint properly, your smoking experience can be a disaster. Get it wrong and you could burn your fingers or lose precious weed from the end. A loosely rolled joint might fall apart, while a joint that doesn’t have enough herb won’t be satisfying. That’s why this guide is so important. We’ve outlined the basics here, so you won’t get it wrong. Follow our advice and you won’t be disappointed.
We’ll make learning how to roll a joint easy with these simple steps:
Step One – Get Your Equipment Together
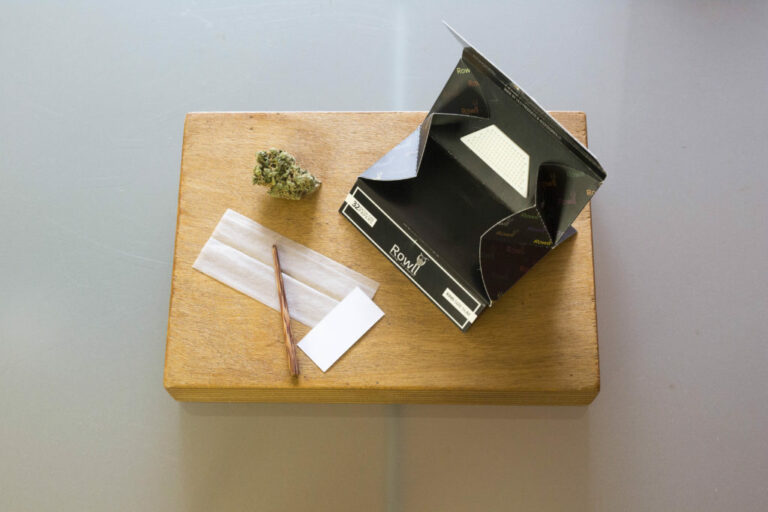
First, you need to get all your essential items together before you start rolling. Here are the essential things you’ll need to roll a joint:
- Your favorite strain of weed
- Rolling papers (Rowll’s rolling papers are an excellent choice)
- Filter (if required)
- Grinder
- (Optional) A packing tool
Step Two – Grinding
Once you’ve got everything together, it’s time to grind your weed. You need it to be ground finely for smoking. Well dried weed breaks down easily for a smooth and pleasant smoke. Using a grinder will stop your hands from getting sticky and will get the desired result. Although it’s possible to grind your herb manually, a grinder is the best choice. Rowll’s all-in-one kit is perfect. It has everything you need to grind weed and roll a joint on the go. Make sure your weed has been ground up but not too fine to where it will go into your mouth as you inhale.
Step Three – Making A Filter
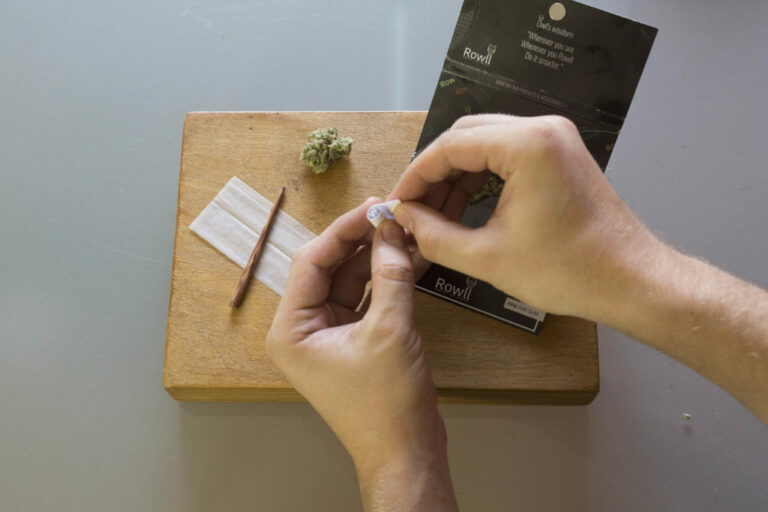
If you want to know how to roll a joint with a filter, this is your next step. You can learn how to roll a joint filter using a piece of thin cardboard. Begin by making some accordion folds in the cardboard’s end. Next, roll up the material, so it reaches your desired joint thickness. This will form an effective homemade filter. Alternatively, you can also get ready-made filter tips which make life easier. You won’t have to put in any effort. Just pop it into your joint and you’re ready to smoke.
When it comes to knowing how to roll a joint a filter is not mandatory. We know that many smoke joints without ever using a filter. Nevertheless, if you have one, you won’t get herb in your mouth as you’re smoking. Filters also keep your joints stable and stop you from burning your fingers. This makes them a useful choice when rolling a joint. However, if you’re not a fan of filters you can skip this step.
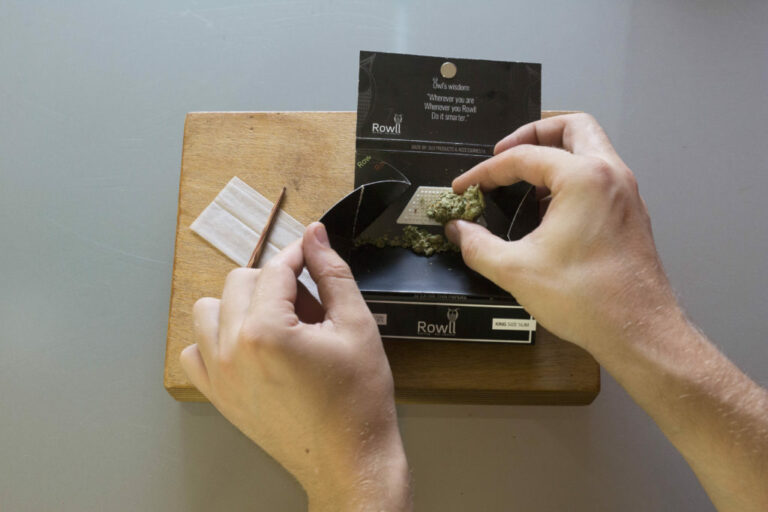
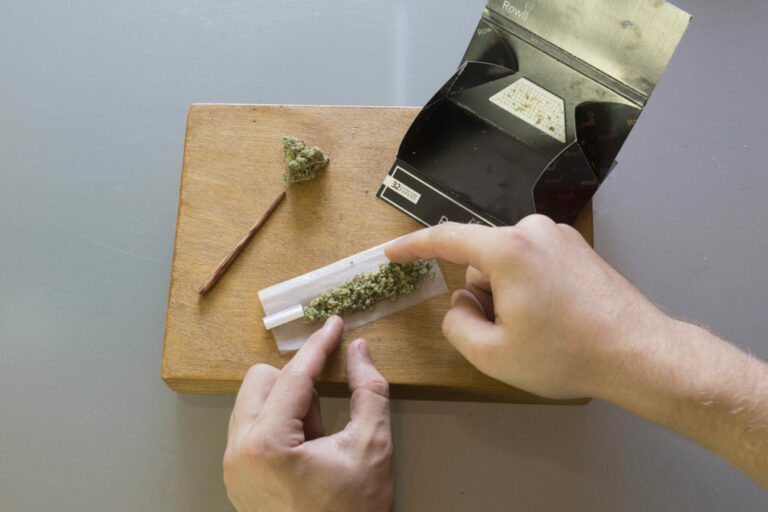
Step Four – Filling The Rolling Paper
Get out your rolling paper and put it face up on a surface. Your next step is to put your filter onto the rolling paper. Put some finely ground herb onto the paper. You will probably need around ½ – 1 gram. You can find lots of kinds of joint papers on the market. Some rolling papers have flavour while others nature-friendly from different materials. Hemp papers are quite popular. This is because they are strong yet thin. They also burn quite evenly and don’t make the weed taste bad. The best rolling papers are extra thin and made from Acacia gum. They also have an adhesive that is non-toxic and nature-friendly. Choose king size papers for larger joints. Once your paper is filled, it’s finally time to learn how to make a joint.
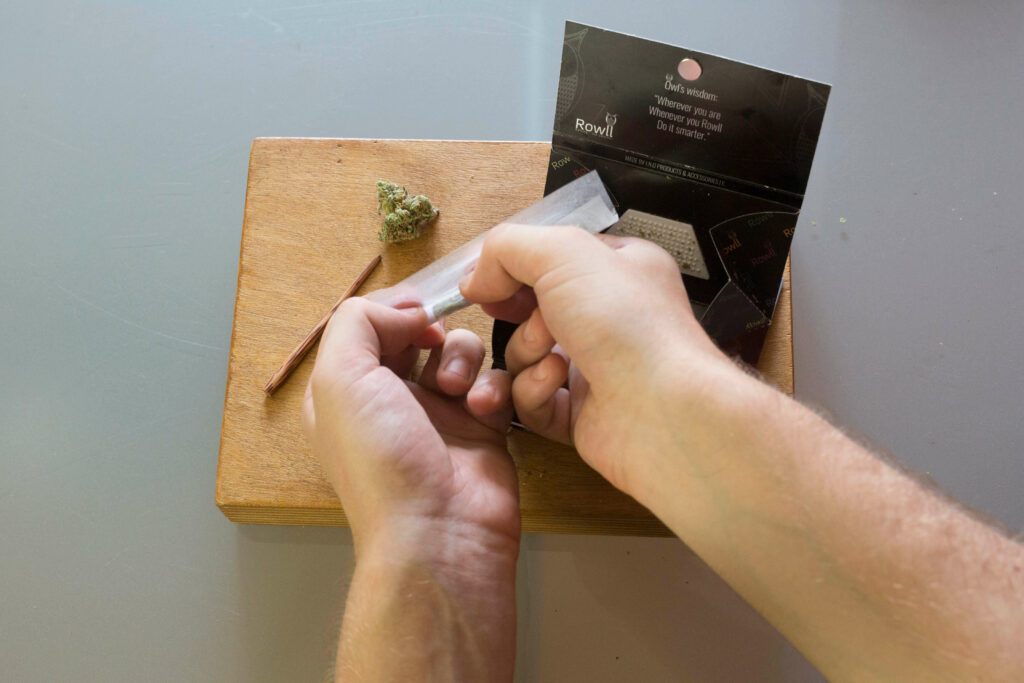
Step Five – Packing Your Joint
Before we move on and explain to you how to roll a joint, you need to know how to shape it. You’ll need to use your fingers to get the herb into the right shape on the paper. Once you’ve evenly loaded your paper with the herb, it’s time to begin rolling. You’ll need to use your fingertips to pinch the rolling paper tightly. Roll the paper backward and forward between your fingers. This will help the weed to be packed down and take the right shape. Although it might sound tricky to learn how to roll papers, you’ll soon get the hang of it.
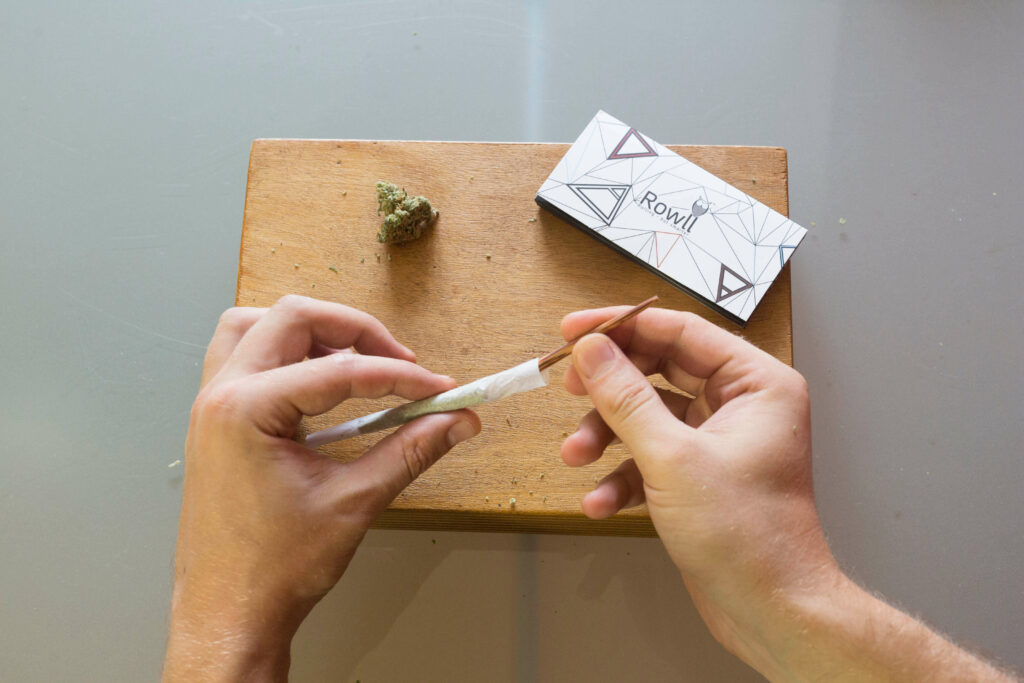
Step Six – How To Roll A Joint
Finally, we’re getting down to the business of learning how to roll a join. Getting this step right is key to enjoying a good quality smoke. First, you need to find the unglued edge of the paper. Tuck into neatly inside the joint roll. Next, get the glued edge. Moisten it slightly but not too much or it won’t stick down properly. It is always easier to begin rolling at the filter end. This is because the filter helps to guide your rolling paper as you roll it around itself. Tack down the filter end of the rolling paper. Once you’ve done this, work down the remainder of the seam. You need to tuck the joint and seal end all the way down to the bottom end. Make sure that your joint is tight and well rolled. Knowing how to roll a tight joint will ensure none of your weed is lost.
Step Seven – Finishing The Joint
You’re nearly ready to light up. The last step is to pack the joint’s end. This is so you can get a more even burn. There are several things you can use to pack your joint’s end. While there are proper packing tools on the market, you don’t really need one. You could simply use a pen, or a stick – anything which packs in the weed. Alternatively, if you don’t want to light up straight away, just twist the tip to close it temporarily.
Step Eight – Light Up
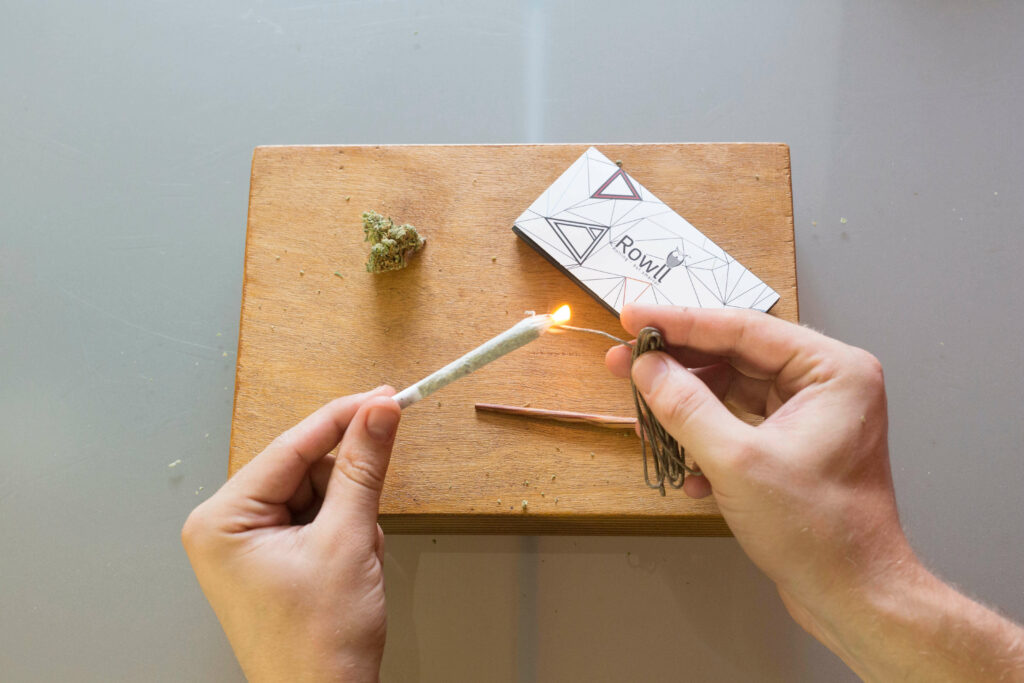
Finally, you’ve reached your goal. You’ve rolled your first joint! Now it’s time to light up and enjoy!
This guide gives you all the basics you need to know about how to roll a joint. Once you’ve got the hang of it, however, there are lots of ways you can innovate. Rolling a joint can be done in endless ways. Whether you want a small joint or a big one, creativity is key! There are even some people out there who have turned joint rolling into an art form. Feel free to use your imagination and see where your creativity takes you.
How To Roll A Joint Video Guide
You don’t like to read? Just check out this video guide Simon did for you.
You can get your own Rowll all-in-one kit here.
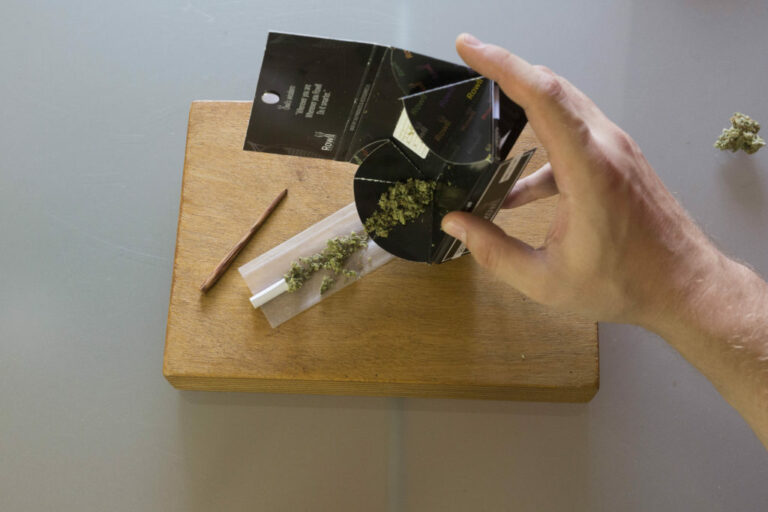
Rolling A Cone Joint
One alternative to the traditional rolled joint is the cone joint. These are much easier to use since you can stuff them and light up. As a bonus, their conical shape allows them to hold more weed than standard joints. Perfect for use in groups, an expertly rolled cone joint won’t fail to impress. Here are some easy to follow instructions:
You’ll need:
- King size rolling paper
- Filter tip
- Grinder
- Your favorite cannabis strain
- The first steps are the same as above. Grind your weed and put your rolling paper with the sticky edge facing upwards.
- Put your filter on the paper’s edge along its crease.
- Put your ground weed onto the paper’s crease. Begin using a small amount at the filter, moving along the length of the paper. As you move towards the joint’s end, use more weed to achieve a cone-shape.
- Hold the paper using both hands. Keep your thumbs towards the front and fold the paper’s front edge around. Tuck the edge behind the cannabis and in front of the paper’s top side.
- Twist tightly. You should now have a well-formed cone shape.
- Now roll the paper’s top side gently. Don’t rush or you’ll crush the paper.
- Before you finish rolling, gently moisten the paper’s sticky edge. Smooth the sticky side down using your finger. Don’t crease the paper.
- If your joint looks a bit empty, pour a little more ground weed into its end. Use a pencil or thin stick to poke your weed more firmly into your joint. Tap it gently.
- Make sure you’ve left a little empty space at the joint’s end. Squeeze this empty space and twist to tighten your joint. This will stop any weed from falling out.
- Now you’re ready to light up.
Now that you have the basics of rolling a joint, you’ll enjoy an amazing smoking experience. The key to getting the most out of your weed is getting your joint right. Get it wrong, and you’ll find a host of problems. From burning your fingers to losing weed out the end, a badly rolled joint is a disaster. Follow the steps outlined here, and you won’t go wrong. You’ll be enjoying an amazing experience before you know it!
Wow so cool i fpund this site highley recommend to look at.
“Knowing the best ways of joints a joint”,,, WTF does that mean??? Lear to write in a common language, then try again!
And to look for Papers you don’t have to think much about it, OutonTrip is your one shop stop for every paper you need.