
Forget Christmas. The best time of the year is harvest time. We can all agree on that. We should also agree that harvesting your bounty is just the tip of the trichome!
Drying and curing your freshly cut pride and joy is one of the most important steps of the process of cultivating cannabis from seed to sativa. Or indica, if that’s your strain. The entire process is an art form, which can be likened to the work of a sculptor.
Curing your bud can help you stand out from the crowd, since many growers skip this step. Mark of an amateur. Not only does proper drying and curing of your cannabis bring out all of your preferred strain’s taste, but it can also drastically improve the quality of your high.
Before you get started, you’ll need:
- A pair of sharp scissors and secateurs for the harvesting process;
- A magnifier glass or a digital microscope to determine the right time to harvest;
- A drying rack for your freshly cut marijuana;
- Quart-sized mason jars for the curing process.
When To Harvest Marijuana For Best Results
Identifying the right window for harvest is perhaps one of the most challenging parts of growing. Not only because it will test your deduction skills, but mostly because you will need to keep yourself from chopping down your buds prematurely.
Fortunately, once you learn how to read the signs, marijuana plants are easy to decipher. As your buds reach maturity, they will start merging and tiny, crystals (trichomes) will start becoming visible around the flowers. Also, the white hair-like pistils around the buds will begin to turn brown. These two are going to be your biggest allies when it comes to harvesting marijuana.
To make your life easier, obtain a magnifier so you can take a better look at the buds. There are many options, from jeweler’s loupes and magnifiers to digital magnifiers that can connect to your laptop. In any case, the ability to see the buds clearly is going to be instrumental.
Observing the Trichomes
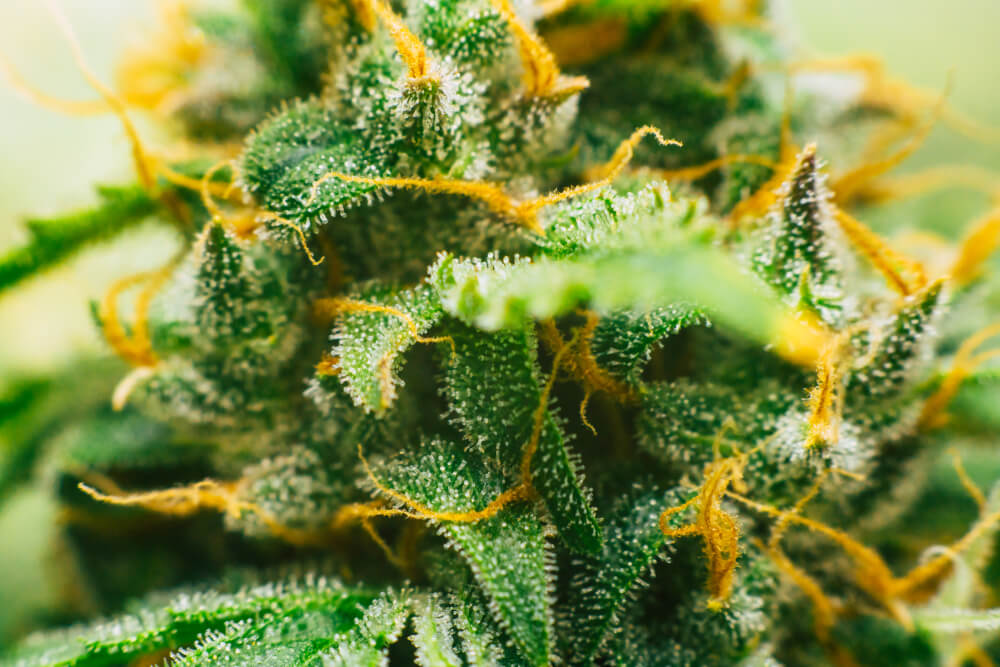
The trichomes are the mushroom-shaped glandular stalks that grow on the buds. They produce the resin where we find the biggest concentration of cannabinoids. Their changing color is perhaps the most reliable sign about the state of your buds.
There are several types of trichomes growing on cannabis buds, but not all of them contribute to the potency of the final product. As the trichome color changes from clear to a milky white, your plant will be nearing harvest. When the percentage of clear/milky trichomes is 50-50, then your buds are ready. If you wait long enough, the trichomes will eventually start turning amber, meaning that THC breaks down to CBN. The longer you wait before harvest, the more intense the bodily effect will be.
Of course, every plant will produce a certain amount of cannabinoids dictated by its genetic predisposition. However, optimal THC amounts can be achieved by harvesting when the plants are half clear/half milky white.
Looking at the Pistils
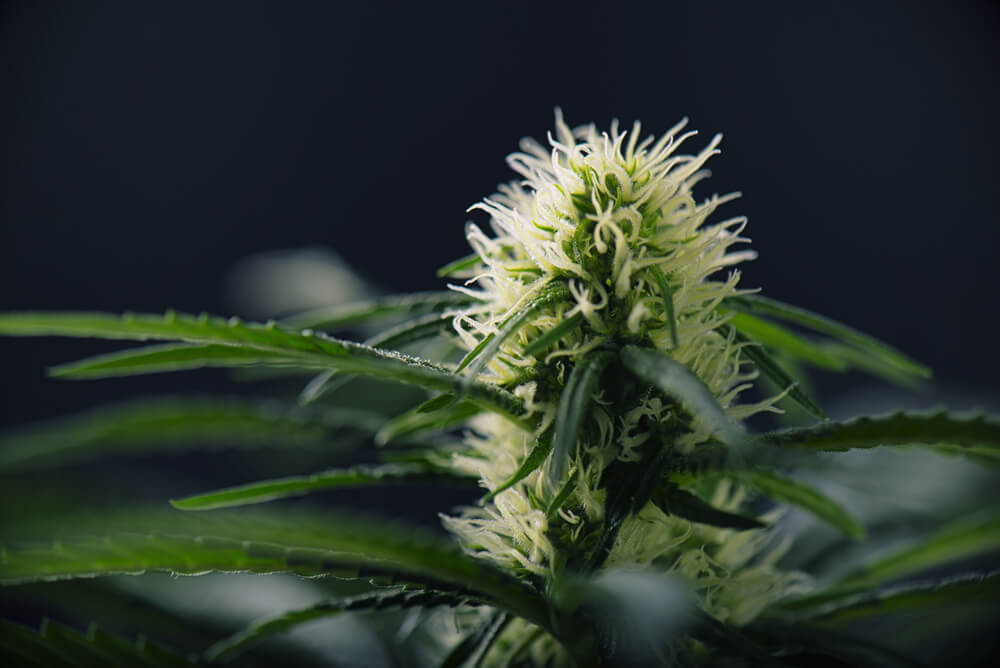
A second, less reliable method for determining the proper harvesting time is by looking at the pistils forming around the bud. When the pistils on your marijuana plant are white and sticking out, the plant is still too young. You need to wait until 50-70% of them start turning brown and curling inwards. Most of the time, it is better to look both at the pistils and the trichomes to determine the right time to harvest marijuana. Bear in mind that according to their genetics, some plants will continue to produce white pistils even when they are almost ready to harvest. If you are unsure, check the trichomes too. This will give you a better idea regarding the status.
How to Harvest Marijuana
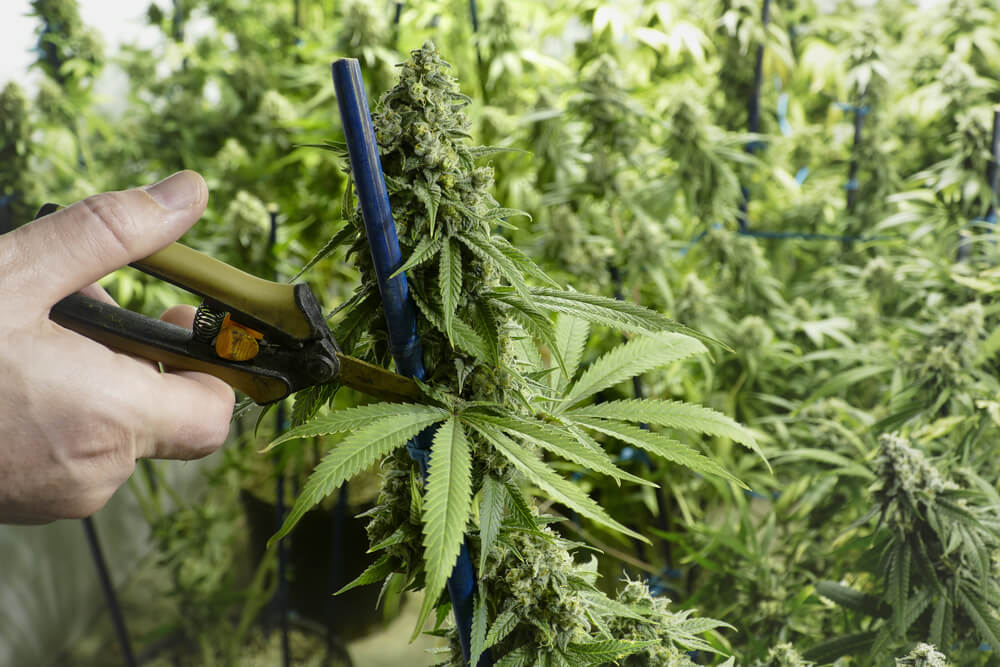
Assuming that you’ve done everything right (some mistakes can also be forgiven, depending on the strain you chose), your plants should be ready for harvesting. The process is not complicated, and you will only need a pair of sharp secateurs or scissors to do it. Also, two weeks before cutting down your plant, it is advised to perform a thorough flushing of your growing medium. This will prevent a buildup of salts in the buds and will lead to a better tasting product.
How to Flush Your Marijuana Plant
Marijuana flushing should ideally be performed slowly over the course of two weeks. During this time, you should only water your plant with distilled water and cut back on any nutrients. In soil, you should be able to do that by watering your plants with neutral pH water (around 6.2).
In hydroponic systems, you just need to run clear water through the system and don’t use any nutrients. In both cases, it is normal to experience some leaf discoloration as your plant will be running low on nutrients.
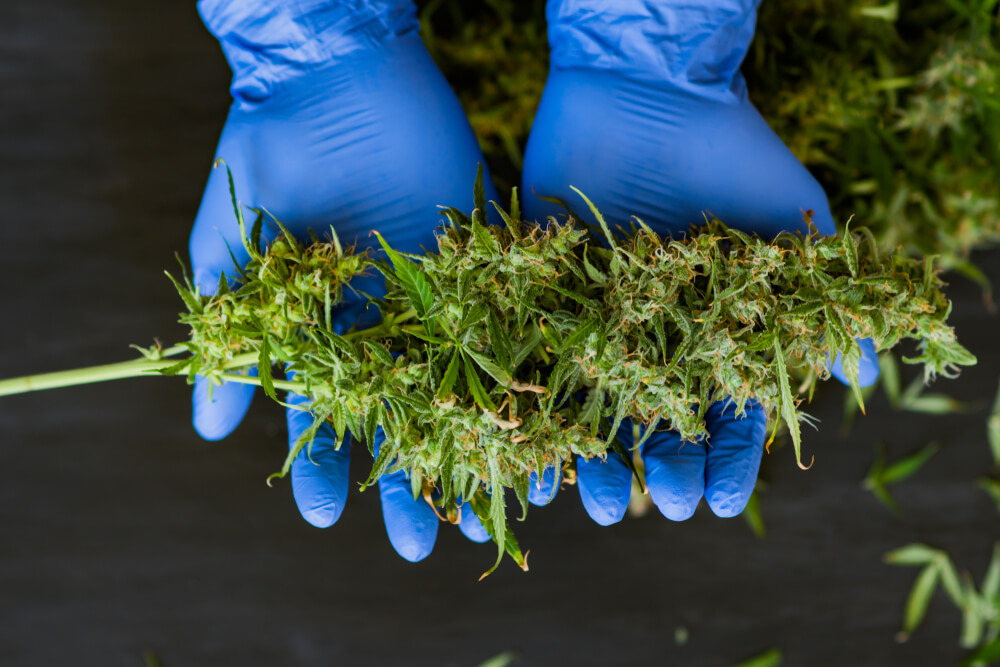
Harvesting and Drying Marijuana
Just before you cut any branches, you should use a pair of scissors to remove the larger leaves. You can cut down the smaller ones as well, but it is recommended to leave them on throughout the curing and drying process, as they protect the trichomes on the buds.
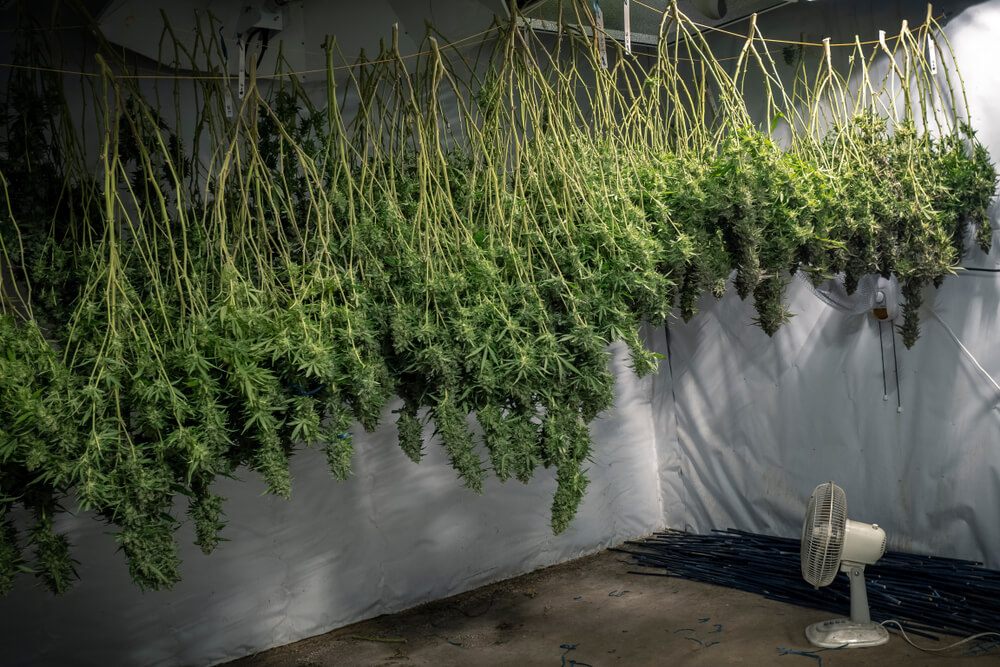
Do not chop and hang the whole plant to dry. Instead cut each branch separately and hang them out to dry independently. Make sure they don’t touch when they are hung out to dry, as this will increase the likelihood of mold development. For the actual drying, you can be as creative as you want! Use a cloth drying rack, a mesh rack or whatever you think will do best. The important thing is that the drying area is not too humid and has excellent air circulation. You can use a fan to aid proper drying, but don’t point it directly at the plants.
DO NOT attempt to speed dry your buds. The proper time frame should be around a week, give or take. It is better for your buds to be a little moist than overdried. When the smaller stems snap off the plant, and the outside of the buds feels dry, it is the best time to move in the next stage. Remember: We need the buds to be somewhat moist for the curing process to work!
What The Pros Know
PRO TIP! Hanging the branches upside down fools the plant into thinking it is still alive, which helps keep the buds healthy since the juices won’t drain where the branch was clipped. Another one: Don’t crowd the branches – it restricts airflow. Plants need their space, man!
Hanging is cheap, but the slower drying can lead to mold. However, dry boards can be expensive, although they offer a better organization. It’s also a good idea to smell-proof your drying space with a carbon filter and extraction unit. Privacy first!
Curing
After your buds have finished drying, it is time for the curing process. Although you might be fed up with waiting up to this point, your buds will not taste that good if smoked right now. Curing is a process that can take anything from two weeks to three months, and it is necessary to bring out the taste, smell and potency of your buds.
Luckily, the process is as simple as placing your buds in the mason jars and open them daily to allow fresh air inside. This will let them dry out evenly and bring out their best taste. Notice that buds which feel wet to the touch should never be closed in jars, as mold can quickly form. This process should take at least two weeks, while a month is an optimal timeframe.
Is Curing Essential?
There are many benefits to curing cannabis after harvest, and some consequences if you skip this integral step in the process.
The #1 reason is simple: good taste. Curing affects the flavor of your bud, and uncured bud can produce a harsh taste. During curing, chlorophyll breaks down, reducing the grassy, fresh-cut lawn taste and resulting in a smoother experience.
Curing also allows you to store your weed over a longer period without losing potency. Besides the flavor, storing uncured weed reduces potency, which is arguably more important than taste. Most agree that the window for storing cured weed and retaining the original potency and flavor is roughly eighteen months.
If the buds are not well cured, mold can begin to form, and this can actually be dangerous to immunocompromised patients.
The #1 rule with curing your crop is to take your time. It’s all about the slow burn, no pun intended. But before you can start administering the cure, you’ve got to get your ‘patient’ all dried out.
Essential Curing Tools
Now your crop is ready to be cured. What’s next?
First, ensure you have the tools of the trade. Here is what you will need:
- Airtight Containers – Most savvy cultivators will use a glass jar. This is not mandatory, however. You can use wood or metal jars, or even ceramic. But steer clear of plastic Tupperware and especially the stereotypical plastic baggies. They’re for selling, not storing.
- Hygrometer – to measure the humidity. You remember, right? You should already have one if you’ve been drying like a boss. You can put individual hygrometers in each jar to measure the humidity individually. There are even fancy jars that come with the hygrometer built in.
The Curing Process
You want to fill the jars only three-quarters of the way, so they still get air. Otherwise, the carefully dried and trimmed buds might still have a chance of catching the moldy syndrome. Loosely packed, so they don’t get crushed or compacted.
Avoiding Mold While Curing
You might be wondering, what is mold, exactly? Mold is a fungi – not a fun guy – but a filamentous fungi, meaning it won’t form shaped like mushrooms. It will appear whitish and orange and prospers in dark, humid places. Give your buds an occasional check-up to ward the mold away.
If they do have mold or smell like ammonia, open your container post-haste to let the buds dry out a little more in a warmer environment.
If your buds don’t get a little softer within the first couple of days, you might have over-dried your bud! See the suggestion in the section above for a remedy.
Pro Tip! Before packing the container, place your dried-out flower in a cardboard, or wooden, box and lightly press it. This will break up the trichomes, spreading the oil and terpenes onto the surface of the flowers.
Another One: Like a baby, your agricultural babies need to be burped in the early stages. Because, like humans, they need air. To burp your buds, open the jar briefly – about two minutes – once or twice a day. This will release moisture and provide fresh oxygen.
Note: Not everyone agrees burping is necessary or healthy. Some experts think if you need to burp them, they have not been dried properly in the first place. Try it and decide for yourself. Burp as instructed for just the first week. After the first week, just once every few days.
Where Should I Store My Airtight Container?
That is another good question. Here’s your reward – the answer. And it’s a simple one – a cool, dark, dry place. You can even use a kitchen cupboard. Make sure the containers are sealed.
The storage facility should have a consistent humidity of between forty-five and fifty percent to prevent fungi and the temperature should remain a little above sixty degrees.
Wanna know the science behind it? Low temperatures inhibit decarboxylation, where THCA – tetrahydrocannabinol acid – synthesizes into THC, the psychoactive compound of cannabis. THC eventually degrades and becomes CBN, a different cannabinoid. Plus, warm air holds more moisture than cold air.
For How Long Should I Store My Airtight Container?
There is a bit of disagreement on the length of the time. Most growers cure the bud for about a month. Others say up to two months. Waiting patiently for four to eight weeks will produce higher potency and more pungent aromas and rich flavors.
Some strains benefit from up to six months of curing. Think of it like aging a fine vintage wine. In any case, the key is to take your time and don’t rush the process.
After The Cure
As mentioned in the opening section, most experts agree on a life span of roughly eighteen months to retain the maximum potency and flavor. You can keep them in the same container but you don’t have to check on them as much.
If you will be storing them for an extended period, you can pick up some humidity packs to help keep them fresh. You can keep the cannabis stored for up to two years, in proper conditions. Decisions should be made based on volume and timespan.
Can I Freeze My Cured Cannabis?
Conceivably, yes. Many people do. It preserves the cannabinoids. A refrigerator will serve the same purpose.
However, there is a drawback: The buds still contain water. That water can freeze and harm the stash, resulting in a loss of therapeutic properties.
To avoid this, vacuum pack them in a freezer free of frost. That way you can be sure the compounds will not get damaged.
Remember, whether home grower or professional, post harvest plans demand preparation. You’ve taken time and care to grow the finest crop you can. Selected the best soil, picked the perfect pots. Why not go all the way? Finish off your flowers high and dry.
Useful Tips
- The harvesting period officially begins when the plant stops growing new pistils, and 30-40% of them have darkened and curled. On the other hand, when trichomes start turning grey (after four weeks into harvesting), your buds will have lost almost all of their psychoactive properties, and they are only useful as a sleeping pill!
- To achieve the highest levels of THC, harvest when most of the trichomes have turned milky white, and 60% of the pistils have turned brown. If you use a powerful enough magnifier, you should be able to see it without problems. Hazy trichomes have a higher THC content.
- Conversely, if you want to achieve the highest possible CBD content, try to harvest at the end of the harvest window, when 20-30% trichomes have turned amber, and the pistils are almost all dark. It goes without saying that to get the most CBD, you should grow a strain with the appropriate genetics (for example, a Haze variety will never reach insane levels of CBD). As the THC degrades, it turns into CBN which gives us a more relaxing feeling. This is an excellent tactic for users who grow medical marijuana.
- Do not harvest while the trichomes are clear and translucent. Also, don’t harvest when the pistils are white and straight. If you do, you will end up with a disappointing yield.
Leave a Reply